Electric shock occurs when you come into contact with an electrical circuit that contains voltage sources and/or current sources that can cause current to flow through the energized part of the body. Typically, a person is sensitive to passing a current of more than 1 mA. In addition, in high-voltage installations, an electric shock is possible without touching live elements, as a result of current leakage or breakdown of the air gap. The strength of the injury depends on the power of the discharge, on the time of exposure, on the nature of the current (direct or alternating), on the condition of the person - the moisture of the hands, etc., as well as on the place of contact and the path of current passage through the body.
Due to the high electrical resistance of human tissues, they heat up quite quickly, which can cause burns. Even relatively small stresses, with short-term contact with the chest, can cause a malfunction of the heart muscle. An electric shock can cause problems in the nervous system, such as erratic muscle contractions. Repeated impacts can cause neuropathy. If the head is hit by an electric current, loss of consciousness may occur.
At sufficiently high voltages and currents, so-called electric arcs can occur, causing severe thermal burns. The electric arc also produces strong light emissions.
Saving the life of a person struck by an electric current largely depends on the speed and correctness of the actions of those assisting him. First aid should be provided immediately, if possible at the scene of the incident, while simultaneously calling medical help.
The person providing assistance should know:
- main signs of violation of the vital functions of the human body;
- general principles of first aid and its techniques in relation to the nature of the injury received by the victim;
- the main methods of carrying and evacuating victims.
The person providing assistance must be able to:
- assess the condition of the victim and determine what kind of help he needs in the first place;
- ensure free patency of the upper respiratory tract;
- perform artificial respiration “mouth to mouth” (“mouth to nose”) and closed cardiac massage and evaluate their effectiveness;
- determine the advisability of calling the victim by ambulance or passing transport.
First aid sequence:
1. Eliminate the impact on the body of damaging factors that threaten the health and life of the victim (free from electric current, remove from a contaminated atmosphere, extinguish burning clothing, etc.), assess the condition of the victim; 2. Determine the nature and severity of the injury, the greatest threat to the life of the victim and the sequence of measures to save him; 3. Carry out the necessary measures to save the victim in order of urgency (restore airway patency, perform artificial respiration, external cardiac massage); 4. Support the victim’s basic vital functions until a medical professional arrives; 5. Call an ambulance or take measures to transport the victim to the nearest medical facility.
In case of electric shock, death is often clinical (“imaginary”), so you should never refuse to provide assistance to the victim and consider him dead due to lack of breathing, heartbeat, or pulse.
Only a doctor has the right to decide on the feasibility or safety of measures to revive the victim and make a conclusion about his death.
Preparation for transportation and general rules
Before moving the victim, you need to carefully examine him to find out what injuries he received. First of all, you should be interested in the condition of the victim’s spine, his head and neck, abdomen, chest, pelvic area, and limbs. You should also make sure that the person is conscious. If the victim is unconscious, pulse and breathing should be checked.
Please note that if the victim’s injuries are severe, transportation should only be carried out if there is no hope of medical assistance at all. In such a situation, the person should be moved in the position in which he was originally located.
In all other cases, it is recommended to adhere to the following transportation methods.
Unconscious persons, as well as victims with bouts of vomiting, burns or injuries to the back of the body, are recommended to be moved in a stable position on their side.
For injuries to the neck, chest and collarbone fractures, the preferred position is for the transported person to be sitting or half-sitting. In case of large blood loss or suspected internal bleeding, as well as in case of abdominal injuries, it is recommended to transport victims in a supine position with their legs elevated.
In the “frog pose”, lying on the back with legs slightly spread and a bolster under the knees, victims with injuries to the spine, spinal cord or suspected fracture of the pelvic bones are transported.
During any transportation, it is important to monitor the condition of the victim. If it worsens, it is necessary to stop for resuscitation measures, such as mouth-to-mouth, mouth-to-nose artificial respiration or chest compressions. Resuscitation is carried out until breathing and pulse are completely restored or doctors appear.
Methods of transporting victims by hand
Despite the fact that mechanized methods of transporting victims are more gentle, methods of carrying, which, as a rule, are practiced without the use of any auxiliary means, directly on the hands, do not lose their relevance.
This kind of transportation over a short distance, for example, from the scene of an accident or injury to a safer place, is extremely necessary to protect the victim from the effects of external damaging factors and for the sake of his comfort. In some cases, short-term self-transportation (without the use of improvised means) is used to deliver the victim to a car, home, or place where he can be given more thorough care.
Organizing a manual (improvised) carrying is a rather complex and responsible matter, requiring a quick response from the victim’s rescuers. In order to choose the correct method of transferring the transported person, first of all, you should assess the severity of the injuries he received, in particular, make sure that his head and neck were not damaged. To do this, it is necessary to carefully examine all parts of his body: head, neck, chest, abdomen and check the limbs, which, in case of injury, will have to be supported during manual transportation.
Dividing victims into the following categories will help you choose the most correct method of carrying by hand:
- Light casualties are those who can walk independently or with minimal support.
- The victims of moderate severity are conscious, but cannot move independently. Transportation is possible in any position.
- Severe victims who can only be carried in a certain position. Most often they are carried in the position in which they are located. However, it should be remembered that when carrying victims with severe compression injuries, their condition seriously worsens.
Taking into account the nature of the injuries, the capabilities available to the rescuer, the distance over which it is necessary to move the victim and the terrain, the most suitable method of transportation by hand is selected.
Transportation of victims by one porter
First, let's look at the most common methods of transporting a victim, if there is only one rescuer next to him.
Accompanying the victim
In the absence of injuries to the chest and abdominal cavity, injuries to the skull, and fractures of the lower extremities, the victim is able to overcome a short distance independently.
In this case, in order for the victim to get to his feet, he must first be given a semi-sitting or sitting state. The role of the rescuer in this case boils down to kneeling at his head, placing his hands under the victim’s shoulders or, kneeling on his side, putting his hands under his shoulder blades, head and neck, and helping him get up. Then the victim will be able to move independently, only relying on the hand of an accompanying person
In more severe cases, after the victim is raised, the rescuer takes the hand from the uninjured side of the injured person with one hand and leads him, holding the armpit on the same side with the other hand. There is another option: the victim throws his arm around the neck of his rescuer, who, in turn, helps him walk, supporting him by the waist or chest. To make movement easier, you can give the victim a stick on which he can lean while walking with his free hand.
If the victim is unconscious or very weak, the rescuer must arrange to carry him using the “hands in front”, “on the shoulder”, or even dragging method.
Carrying by hand
Rescuers often have to carry victims out of narrow passages, stairs and other confined spaces. In this case, special methods of moving victims are used, in particular, carrying them in your arms in a sitting position.
When carrying a victim in his arms in front of him, the rescuer must lift him. To do this, he kneels on the side of the victim, holds the latter behind his back with one hand, and places the other under his buttocks. Then he gets up. During movement, the transported person can hold on to the shoulders of his porter.
This method of carrying requires constant and significant effort on the part of the rescuer, creating a large load on a specific muscle group. Therefore, it cannot be used for long distance transportation.
In cases of carrying over significant distances, it is better to transfer the main efforts to the muscles of the porter’s torso. In this situation, the method of carrying the victim on the shoulder is more suitable.
Carrying on the shoulder
In some cases, for example, if the victim is unconscious, this method of carrying, although it requires significant strength from the rescuer and reduces his visibility during movement, is the most acceptable. In particular, carrying on the shoulder is practiced in emergency cases, when there is nowhere to wait for help and there are no available means (straps or belts).
To carry it out, the rescuer requires confidence in his strength and a quick analysis of the nature and severity of the victim’s injuries. The rescuer lifts the injured person onto his right shoulder, stomach down, so that the victim's head is on the porter's back.
To do this, he uses the following algorithm of actions:
- Places the victim on some elevated surface, such as a window sill or step.
- Grabs the victim's right wrist with his left hand, then slides his right hand under his hips and straightens the victim's right arm with his left hand.
- Places his shoulders under the upper body of the person being transported.
- Shifts the victim's upper body forward so that its weight rests on the porter's shoulders, while holding the victim's wrist with his right hand.
- He straightens up, placing his left hand on his thigh.
For ease of carrying, the rescuer can place an improvised pillow under his shoulder.
Carrying by dragging
This method of transportation is relevant in the case when a victim who cannot move independently needs to be evacuated very quickly, for example, from the scene of a car accident. In such cases, the rescuer can drag him to a safer place by grabbing him under the arms.
The positive aspects of this method include the supine position of the victim, in which the weight is distributed evenly, which allows him to be quickly dragged alone even by a rescuer who does not have enormous strength.
A huge disadvantage of dragging without the use of improvised means is shaking, which can greatly harm the condition of the injured person. Therefore, this method of carrying is applicable only in extreme cases and for short distances.
Carrying on your back
It is recommended to carry the victim “on his back” (“on his back”) in cases where he can stand on his own, but it is difficult for him to move. The porter places the victim on an elevated place and, turning his back to him, kneels between his legs on one knee. The victim grabs the porter by the shoulders or belt, after which his rescuer stands up, supporting the transported person under the hips with his arms pulled back.
The main load with this method of transportation falls on the rescuer’s back muscles, thanks to which the victim can be carried over long distances, including over rough terrain. However, in the absence of available means, this method of carrying also requires endurance and good physical condition of the porter. In addition, it is not suitable for transporting unconscious, weakened or fractured victims.
All of the above methods require great physical strength from the rescuer, and therefore their use is limited only to transporting victims over short distances.
Ways to revive the body during clinical death
Artificial respiration
Artificial respiration is carried out in cases where the victim is not breathing or breathing very poorly, as well as if his breathing is constantly deteriorating. The most effective method of artificial respiration is the “Mouth to Mouth” or “Mouth to Nose” method. To carry out artificial respiration, the victim should be laid on his back, loosen tight clothing, ensure patency of the upper respiratory tract and remove foreign contents (slipped dentures, vomit, etc.) from the mouth with a finger wrapped in a scarf or bandage.
After this, the person providing assistance is located on the side of the victim’s head, puts one hand under the victim’s neck, and with the palm of the other hand presses on his forehead, throwing his head back as much as possible. In this case, the root of the tongue rises and frees the entrance to the larynx, and the victim’s mouth opens. The person providing assistance leans towards the victim’s face, takes a deep breath with his open mouth, completely tightly covers the victim’s open mouth with his lips and exhales vigorously, blowing air into his mouth with some effort; at the same time, he covers the victim’s nose with his cheek or the fingers of his hand on the forehead. In this case, it is imperative to observe the victim’s chest, which rises. As soon as the chest wall rises, the air injection stops, the person providing assistance turns his face to the side, and the victim exhales passively. If the victim’s pulse is well determined and only artificial respiration is necessary, then the interval between artificial breaths should be 5 seconds (12 respiratory cycles per minute).
When performing artificial respiration, the person refusing assistance must ensure that air does not enter the victim’s stomach.
When air enters the stomach, bloating occurs under the “spoon”. In this case, gently press the palm of your hand on the stomach between the sternum and the navel. This may cause vomiting, in which case it is necessary to turn the head and shoulders to the side to clear his mouth and throat. If the victim’s jaws are tightly clenched and it is impossible to open his mouth, artificial respiration should be performed “mouth to nose.” For small children, air is blown into the mouth and nose at the same time, covering the child’s nose with their mouth. Insufflation is performed on the child (15-18 times per minute).
Stop artificial respiration after the victim has restored sufficiently deep and rhythmic spontaneous breathing. In the absence of not only breathing, but also a pulse in the carotid artery, make 2 artificial breaths in a row and begin external cardiac massage.
External cardiac massage
In case of damage to el. electric shock can cause not only respiratory arrest, but also blood circulation when the heart does not circulate blood through the vessels. To restore blood circulation artificially, an external heart massage is performed. The human heart is located in the chest between the sternum and the spine. If you press on the sternum, the heart will be compressed between the sternum and the spine and blood will be squeezed out of its cavities into the vessels. If you press on the sternum with jerky movements, the blood will be pushed out of the cavities of the heart in almost the same way as occurs during its natural contraction. This is called external (indirect, closed) cardiac massage.
Indications for the use of resuscitation measures are cardiac arrest, loss of consciousness, pallor or cyanosis of the skin, loss of consciousness, absence of a pulse in the carotid arteries, cessation of breathing or incorrect inhalations. In case of cardiac arrest, without wasting a second, the victim must be laid on a flat, hard base and his head thrown back.
If one person is providing assistance, he is located on the side of the victim and, bending down, makes 2 quick blows (using the “mouth to mouth” method), then rises, remaining on the same side of the victim. The palm of one hand is placed on the lower half of the sternum (2 fingers higher from the solar plexus) and the fingers are raised. He places the palm of his second hand on top of the first across or lengthwise and presses, helping by tilting his body. Apply pressure with a quick push so as to displace the sternum by 4-5 cm. If revival is carried out by one person, then he makes 2 injections - 15 pressures in 1 minute. It is necessary to make 12 injections - 60 pressures. If revival is carried out by 2 people, then they perform: 1 injection – 5 pressures.
If resuscitation measures are carried out correctly: the skin begins to turn pink, the pupils narrow, and spontaneous breathing is restored. After cardiac activity is restored and the pulse is well determined, the cardiac massage immediately stops, continuing artificial respiration with weak breathing of the victim. When full spontaneous breathing is restored, artificial respiration also stops. If cardiac activity or spontaneous breathing has not yet been restored, then resuscitation measures can only be stopped when the victim is transferred to the hands of a medical worker.
For children from one to 12 years old, heart massage is performed from 70-100 pressures per minute.
For children under one year old, 100-120 pressures per minute are applied with two fingers.
First aid for injury
Any wound can contain microbes located on the wounding object, on the victim’s skin, as well as in dust in the ground, etc. To avoid infection with tetanus (a serious disease with a high mortality rate), special attention should be paid to wounds contaminated with soil. Urgent consultation with a doctor for the administration of tetanus serum prevents this disease.
When providing first aid, the following rules must be strictly observed:
- You cannot wash the wound with water or even any medicinal substance, cover it with powders and cover it with ointments, as this prevents the healing of the wound and contributes to the introduction of dirt from the surface of the skin into it, which causes subsequent suppuration.
- You cannot wash sand, earth, etc. from the wound, since it is impossible to remove everything that contaminates the wound in this way, but at the same time you can rub the dirt deeper and more easily cause infection of the wound; only a doctor can clean the wound properly.
- Blood clots cannot be removed from the wound, because this may cause severe bleeding.
- Do not wrap the wound with insulating tape.
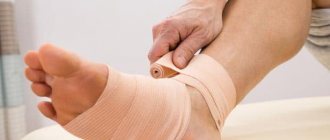
To provide first aid for a wound, you should open the individual package in the first aid kit (bag), apply the sterile dressing material contained in it to the wound and bandage it.
Transporting the victim by two porters
It is a little easier to transport victims if you have an assistant. Together, the victim can be carried in both a sitting and lying position. Thus, to transport conscious victims who can move, a “lock” of 3 or 4 hands is practiced, and in an unconscious state, the “one after another” method is used.
Carrying in a one-by-one manner
This method of transporting a victim in a supine position is performed as follows: one of the porters takes the victim under the armpits, and the second, standing between the victim’s legs with his back to him, picks him up by the legs, just below the knees. This method is not suitable for victims with limb fractures.
Another option for carrying the victim in a “one after another” manner in a semi-sitting position is applicable in cases where the person being transported is unconscious or his rescuers have every reason to transport the patient in a sitting position.
In such cases, the transfer algorithm is as follows. One of the rescuers needs to kneel at the head of the victim and, supporting him under his arms, lift him to a sitting position, leaning his head and back against him. At this time, the second rescuer should take a place between the victim’s legs and grab his thighs under his armpits. In this position, the porters lift the victim for further transportation.
In cases where an unconscious patient is being transported, rescuers must ensure that his upper limbs do not hang down. Also, when transporting a victim with a skull injury, it is unacceptable for his head to hang down or his chin to be pressed to his chest, since such postures lead to a significant increase in congestion in the brain.
Best materials of the month
- Coronaviruses: SARS-CoV-2 (COVID-19)
- Antibiotics for the prevention and treatment of COVID-19: how effective are they?
- The most common "office" diseases
- Does vodka kill coronavirus?
- How to stay alive on our roads?
Due to the heavy load on the hands of porters, carrying by two people “one behind the other” without the use of improvised means is also practiced over short distances.
Carrying with a lock
With this method of transportation, the hands of the porters form a kind of seat (“castle”). Depending on the number of people involved in carrying the victim, three types of “lock” are described. In one of them, two hands are connected into a “lock” - one from each bearer. The second “lock” involves three hands - two of one and one of the other bearer, and the third, most complex version of the “lock” is performed with four hands.
For carrying victims with mild injuries, the most convenient to use is the third method of transportation on a “chair” - a four-hand “lock”.
To carry it out, two bearers are required, each of whom fixes his right hand on his left wrist, and with his left he grabs the right wrist of his partner. The result is a kind of “throne” on which the victim is transported. The victim sitting in such an improvised chair even has the opportunity to hold on to the shoulders or neck of his saviors with one or two hands.
Due to the comfortable position of the victim, this method of transportation has proven itself well over short distances, including when climbing stairs or overcoming rough terrain. However, the prerequisites for its successful implementation are approximately the same height of the porters and their excellent physical fitness. Among the disadvantages of this method, it is also worth noting the rapid fatigue of the hands (they sweat and slip) and the inconvenience when moving along a narrow path (porters can only walk sideways).
A three-handed “lock” is practiced in cases where, due to an injury or state of weakness, the transported person requires support from the outside, since he cannot hold on to the rescuers’ neck. The algorithm for creating a seat for such a patient is as follows. The bearer, who has less physical strength, fixes his right hand on his left forearm, and with his left he grabs the right forearm of his partner. The more resilient porter fixes his right hand on the right forearm of his comrade, and with his free left hand supports the transported person behind his back.
In a two-hand lock, only the rescuers' right and left hands are involved and they can move straight.
The victim is seated on the resulting seat, and each of the porters has the opportunity to support him with his free hand.
Relief from electric current
In case of electric shock, it is necessary to free the victim from the effects of shock as soon as possible, because The severity of the electrical injury depends on the duration of this action.
Touching live parts that are energized in most cases causes involuntary convulsive muscle contractions and general agitation, which can lead to disruption, even complete cessation of the respiratory and circulatory system.
If the victim holds the wire with his hands, his fingers become so tight that it becomes impossible to free the wire from his hands.
Therefore, the first action of assistance should be to immediately turn off that part of the electrical installation that the victim touches.
Disconnection is carried out using a switch, switch, and also by removing or unscrewing fuses.
If it is impossible to turn off the installation quickly enough, it is necessary to take other measures to free the victim from the action of the current.
In all cases, the person providing assistance should not touch the victim without proper precautions, because it's life-threatening.
He must also ensure that he himself does not come into contact with the live part and under step voltage.
Voltage up to 1000V
To separate the victim from live parts or wires with voltage up to 1000V, you should use a rope, stick, board or dry object that does not conduct electric current.
You can also pull him by the clothing (if it is dry and lags behind the body), for example, by the hem of a jacket or coat, by the collar, while avoiding touching surrounding metal objects and parts of the victim’s body that are not covered by clothing. When pulling the victim by the legs, the person providing assistance should not touch his shoes or clothes, because shoes and clothing may be damp and conduct electrical current.
To isolate the hands, the person providing assistance must wear dielectric gloves or wrap a scarf around the hand, put a cloth cap on it, throw a rubber mat or just dry cloth over the victim. You can also insulate yourself by standing on a rubber mat, dry board, or non-conductive sole. When separating a victim from live parts, it is recommended to act with one hand, holding the other in your pocket or behind your back.
If an electric current passes into the ground through the victim and he convulsively squeezes one current-carrying element in his hand (for example, a wire, it is easier to interrupt the current by separating the victim from the ground), slip a dry board under him, or pull him by his clothes. You can also cut the wires with an ax with a dry wooden handle or cut them with a tool with insulated handles (nippers, pliers). It is necessary to cut the wires in phases, i.e. each wire separately, and it is necessary to stand on dry boards or a wooden ladder.
Voltage over 1000V
To separate the victim from live parts energized above 1000V, you should wear dielectric gloves and boots, use a rod or insulating ends designed for the appropriate voltage. In this case, one must remember about the danger of step voltage if the live part lies on the ground and after freeing the victim from the action of the current, it is necessary to remove him from the dangerous zone.
On power lines, to free the victim if he touches the wires, short-circuit the wires by throwing a flexible, uninsulated wire over them.
The wire must have a sufficient cross-section so that it does not burn out when a short circuit current passes through it. Before making a surge, one end of the wire must be grounded (connect it to the body of a metal support, grounding descent, etc.). The conductor must be thrown so that it does not touch people, including the person providing assistance and the victim. If the victim touches one wire, it is often sufficient to ground only that wire.